I had trawled the internet to search for replacement seat springs for an LD 150 Mk 2. There appeared to be new ones available for dual seats as fitted on the later models but nothing for my front and rear seats.
The original springs are 8.0mm diameter with a wire thickness of 1.6mm, 13 for the front seat and 11 for the pillion seat
Whilst searching I came across a really good blog, "Lambretta LD Restoration" which had a very useful entry on seat restoration ( http://billy192.blogspot.co.uk/2011/11/stage-3-with-lambretta.html ). He also had the problem of sourcing springs and had read of someone else making his own using a flexible drain cleaning spring from B&Q.

B&Q 6ft Spring Spiral Drain Cleaner
Length 6ft (1.8m)
cost about £7
Spring diameter 5.5mm
wire thickness 1.2mm
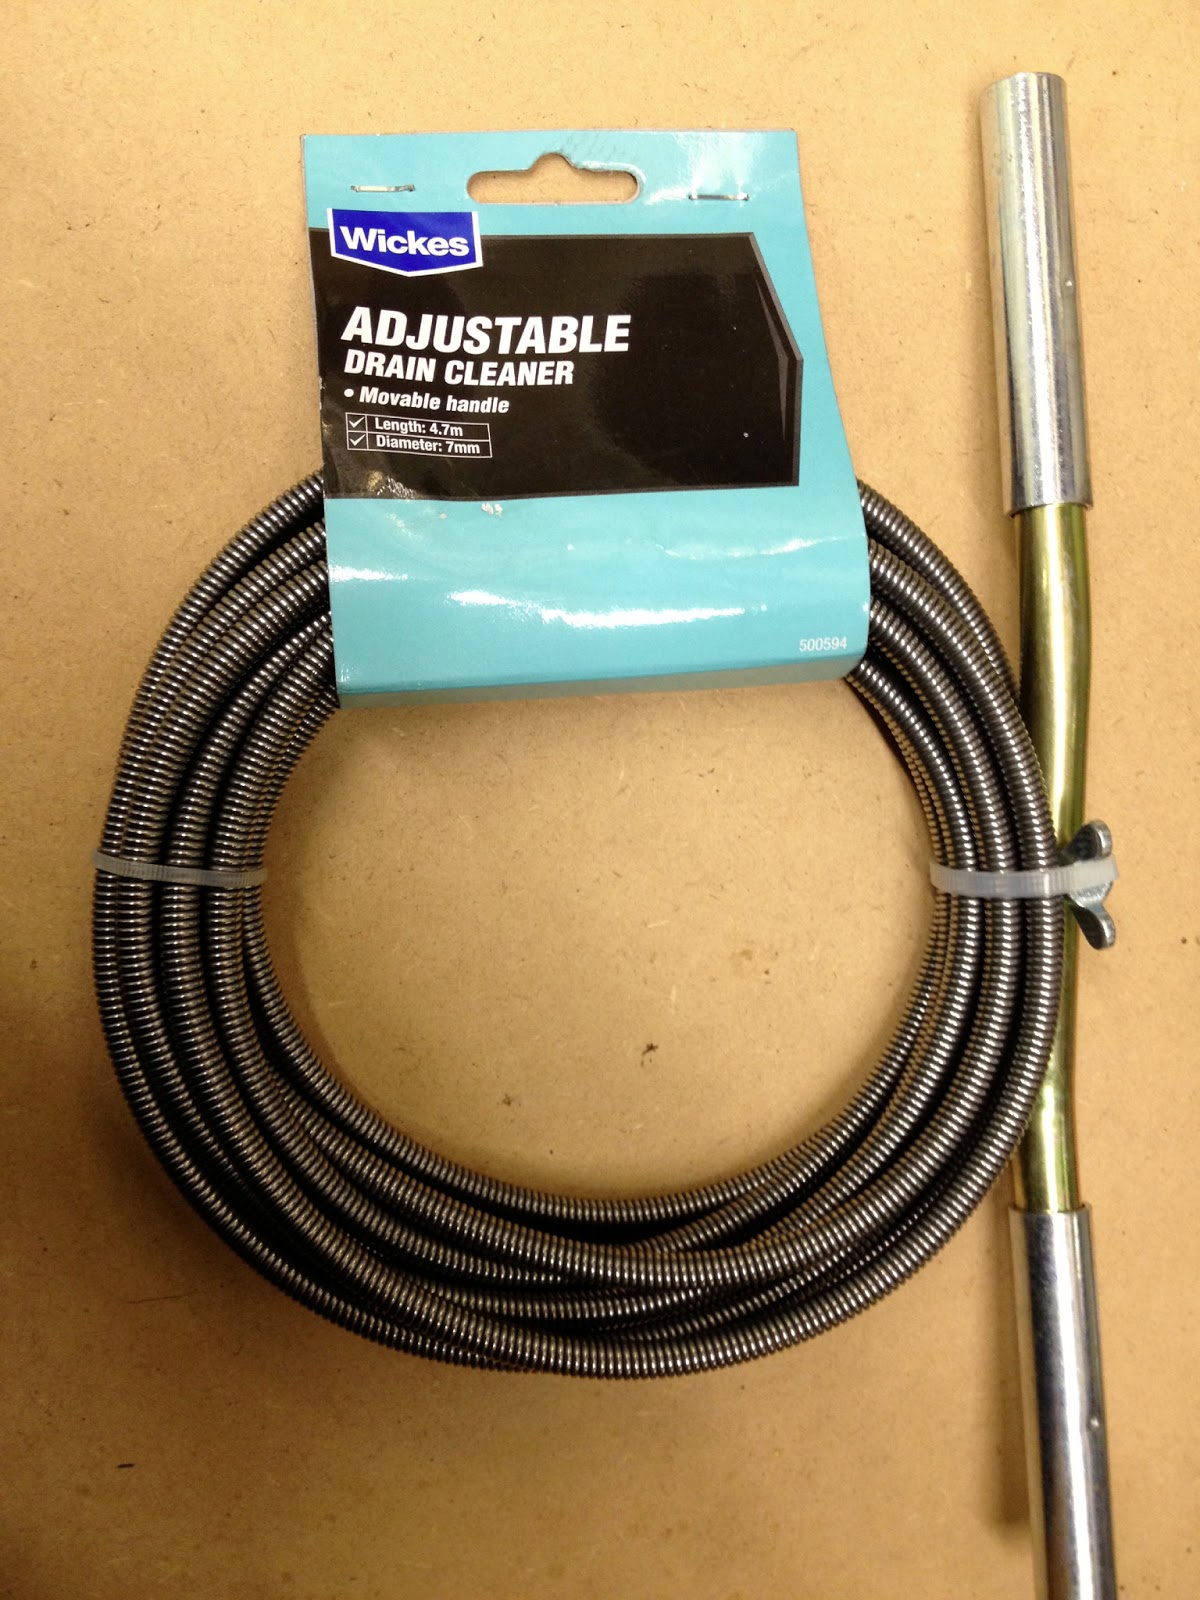
WICKES Adjustable Drain Cleaner
part No W500594W
Length 4.7m
Cost approximately £15
Spring diameter 7.4mm
wire thickness 1.4mm.
Note:- this provided sufficient for all 26 springs and some left over.
With two options for the replacement springs I couldn't resist the temptation to check the spring rates, I didn't have much choice but I wanted to know where they were compared to the originals. My test was simple, I fixed one end of the spring in a vice and attached the other end to a spring balance. I stretched the spring 0.5 inches and noted the load on the balance. Not very accurate but the results were as follows:-
ORIGINAL 11 lbs
WICKES 21lbs
B&Q 8lbs
Despite the higher reading the WICKES spring felt best so I went ahead and started making the springs for the pillion seat.

The spring is supplied with both ends terminated ready for drain clearing. Firstly cut off one of these ends in readiness to form the hook end for attaching to the seat frame. I used a Junior hacksaw, whilst the spring material is hard it was possible to make one blade survive all the cutting.


In most cases the hook ends are at 90 degrees to each other so that when assembled the spring is not in torsion, only tension. I think there were only two positions where the hooks were in the same plane.
I was concerned that heating the end of the coil would result in the wire being left too soft. So much so that it would straighten out under tension. I didn't want to have to re temper each end so I was relieved when this proved not to be a problem. It will be interesting to see how the springs respond to use.
I noticed that whilst there were thirteen holes in the back frame there were only eleven holes in the front fixing. There was an obvious space in the front fixing to accommodate the addition two holes so I went ahead and drilled them. I have no idea why they were missing.
 |
| Pillion - Rear fixing |
 |
| Pillion - Front Fixing - missing holes |
 | ||||||
| The completed Pillion Seat |
 |
| The Completed front seat |
nice work Rex
ReplyDelete